Latest:
Oct 28: good progress


- plugins are pretty much figured out
- got audio recording POC done. looking into midi and proper file saving next
- overall doing well. but i think i can go faster
August 27th: progress
The new stack is opengl and tracktion_engine. been making good progress on the audio and graphics.
 I’m starting to really hate c++. I want to rewrite the whole thing in c or zig but I’m worried that it won’t work and I’ll get stuck.
Jun 18th (2024):
Restarting. Gonna use tracktion_engine for the core audio stuff and write an emulator with ncurses.
Also moving from an hdmi display to pure 128x128 SPI. A lot simpler and also more unique.
Lastly, the pi cm4 is back in stock so I think I’m gonna go with that this time.
I had a lot of trouble just getting i2c to work on the radxa, and it’s better in both cost and time to use the pis.
August 16th: PCB DONE!!!!!!!!!!!!!!!!!!!!
- It’s pretty crazy how quickly JLCPCB processes orders
August 9th: PCB almost done
- Close up
- Pretty close on the PCB, gonna order this week I think
July 7th: timeline + new terminal setup
- Kinda busy lately but implemented recording/timeline
- Idk how optimized it is (I feel like I’m checking positions super redundantly + wasting alot of memory)
- Started reading A Tour of C++ by Bjarne Stroustrup, really need to get better at c++
ALSO I got a new terminal setup (copied from jdh)
June 26th: Built box on the radxa zero
- Basically the same process as allolib/allotemplate
- Made me realise that I did a ton of unnecessary setup (linking my own gamma/sndfile libraries for example)
- Pretty cool that it works
- Also got GPIO working
- Once I have an i2c demo done I’m gonna order the PCBs!!!
June 20th: Built allolib on the radxa zero
I decided to build natively instead of cross compiling
- Native compiles literally take >20 minutes
- I think overall the compile time doesn’t matter that much since I only need to rebuild when I add a new library
This actually took me a really long time (~3 weeks)
Ran into a bunch of issues
- No OpenGL support :(
- I actually started my testing using a Raspberry pi 4 (thanks to the Gaming Warlord Titan Pharaoh Jacob Lin)
- Raspbian only has support for OpenGL 3.1 for some reason, even though the hardware is capable of 3.2
- GLFW (windowing system) needs OpenGL 3.2 as a minimum, so it could never create the window
- I didn’t know about this (or that the radxa zero actually supported 3.2) so buying the radxa was complete luck
- No wifi support for AP6212 chip (wifi/bluetooth module was replaced on the radxa zero due to supply issues, many distributions didn’t have firmware
- Had to flash ~5 times? Manjaro, 3 versions of Armbian, and I also tried starting with ubuntu server and manually downloading a desktop environment
- eventually succeeded with debian desktop (which actually seems like the most straightforward approach, not sure why I didn’t do it first)
June 6th: HDMI LCD display came!!
There’s still a lot of problems with this design:
- HDMI audio works, but I can’t get pulseAudio (with Gamma) to recognize it as a device
- I bought the wrong display 💀 (so there’s no screws to attach it)
- Lastly, I still haven’t figured out cross compiling
May 16th: Hardware - I2C GPIO Expander
Got my prototype GPIO expander working.
I’m using the CAT9555, an I2C chip with 16 input/output pins.
It communicates over I2C, which is really nice because it only uses 2 pins, SDA and SCL
Additionally, you can chain them together, with up to 8 on the same 2 lines by modifying the I2C address pins, which lets you have up to 128 IO lines with only 2 pins!!!! (8 IC’s should still be within the 3mA limit
 credit: bluedot
May 4th: Got pixel image rendering working

I’m using allolib’s Image class, which stores images as a vector of uint8_t’s
Every 4 indices represents a pixel’s Red, Green, Blue, and transparency values (stride = 4)
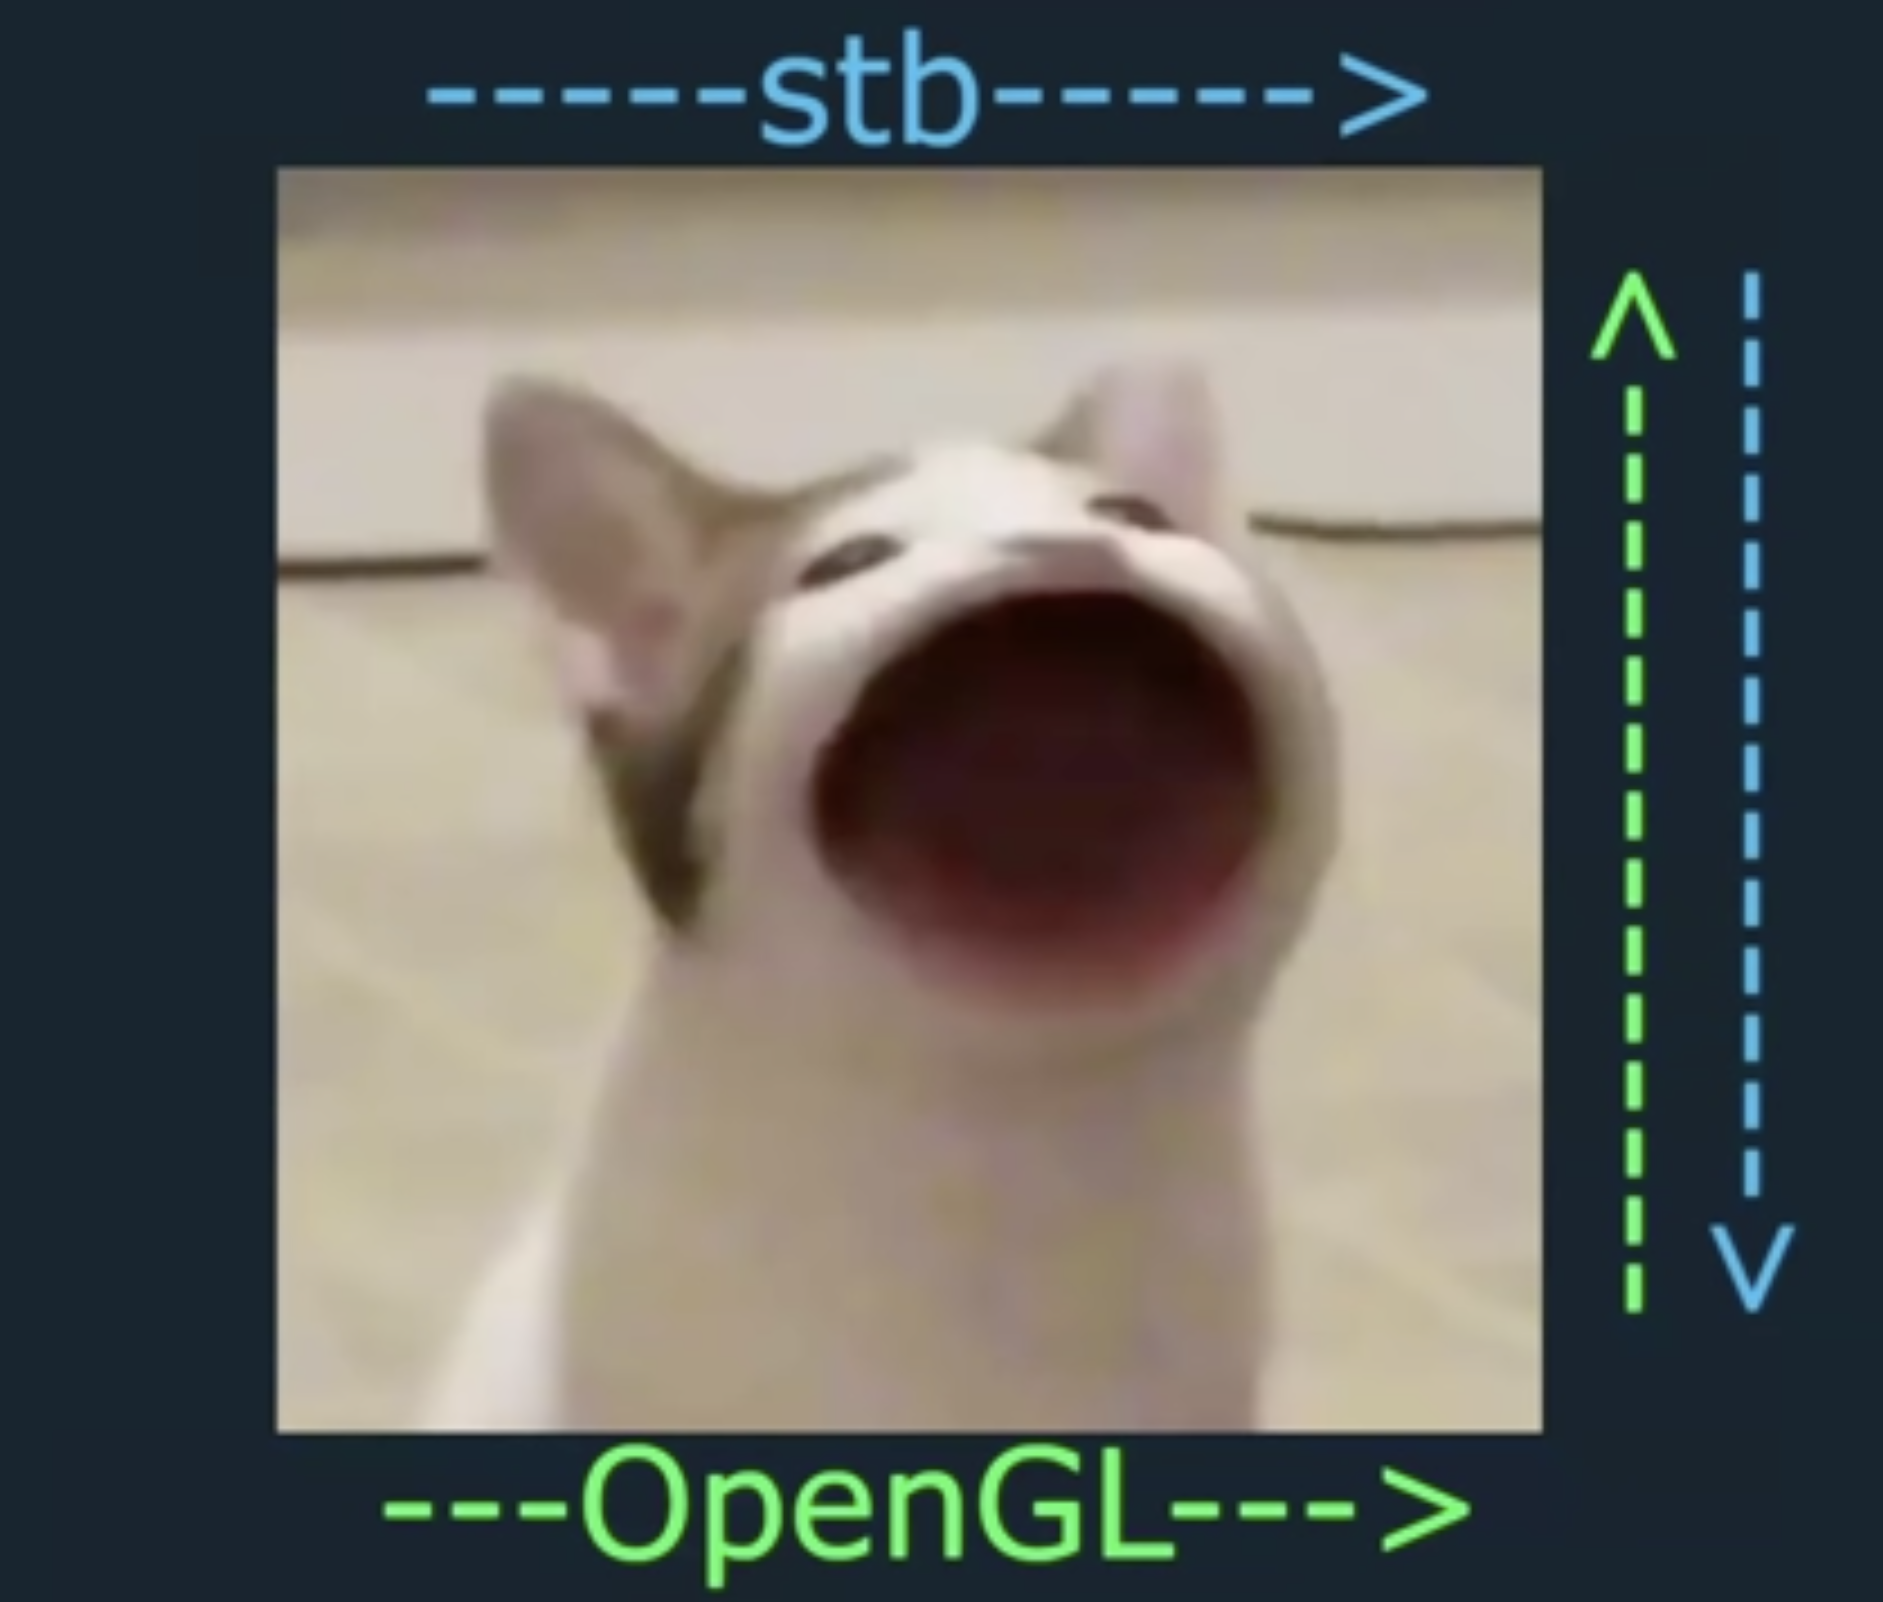
I’m then just iterating through the pixels to plot each one on the screen. You have to iterate in reverse because stb has a different coordinate system than openGL (see below). This means if I draw it regularly, it will actually be flipped upside down. I think the “official” way to fix this is to run:
stbi_set_flip_vertically_on_load(true);
The only thing was, I was worried that it would mess up other texture rendering services (in allolib), so even though it’s more annoying this way, it will probably end up better overall.
I feel like in general the double for loop is a super slow approach, but I’m also not sure how to make it better. The one thing I did think of is to not run plot_pixel() if the pixel has a transparency of 0 (visibility of 0?) because it won’t be visible anyway.
int position = x_position * t_width + y_position;

for (int y=image.height()-1;y>=0;y--) {
    for (int x=image.width()-1;x>=0;x--) {

        int red = get_image_index(x, y, image);
        int green = red + 1;
        int blue = red + 2;
        int a = red + 3;

        if (a!=0) {
            al::Color c (image.array()[red]/255., image.array()[green]/255., image.array()[blue]/255., image.array()[a]/255.);

            plot_pixel(c, x_position - x, y_position - y);
        }

    }
}
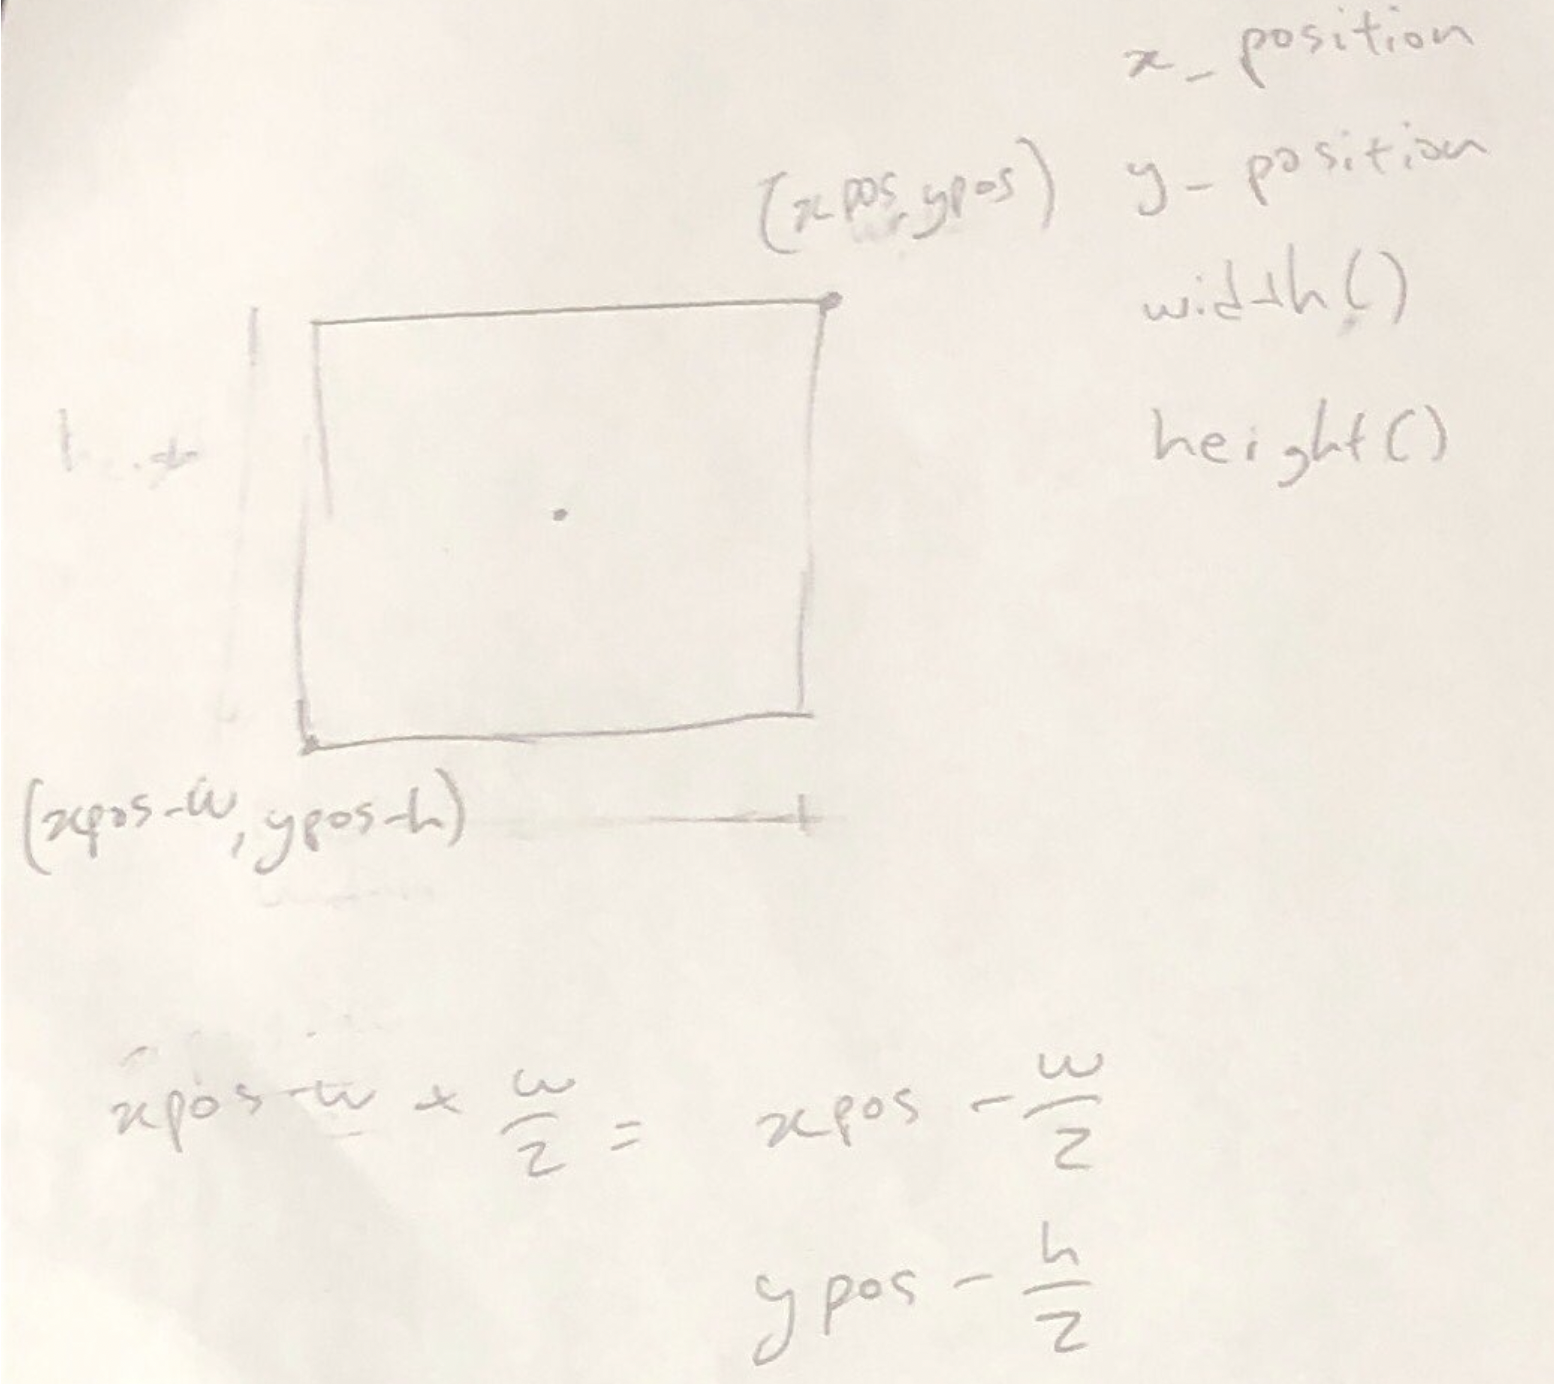
Here’s how I got the image to be centered, one kind of annoying thing is that I made the MF DOOM head asymmetrical (odd pixel width) when I drew it, so I can’t actually center it. Kinda nice how the integer rounding is actually useful here though!
ALSO note to self: use square images that are multiples of 2^n i.e. 2x2, 4x4, 16x16, 2048x2048 because they are better optimized or something
April 29th: Got pixel drawing working
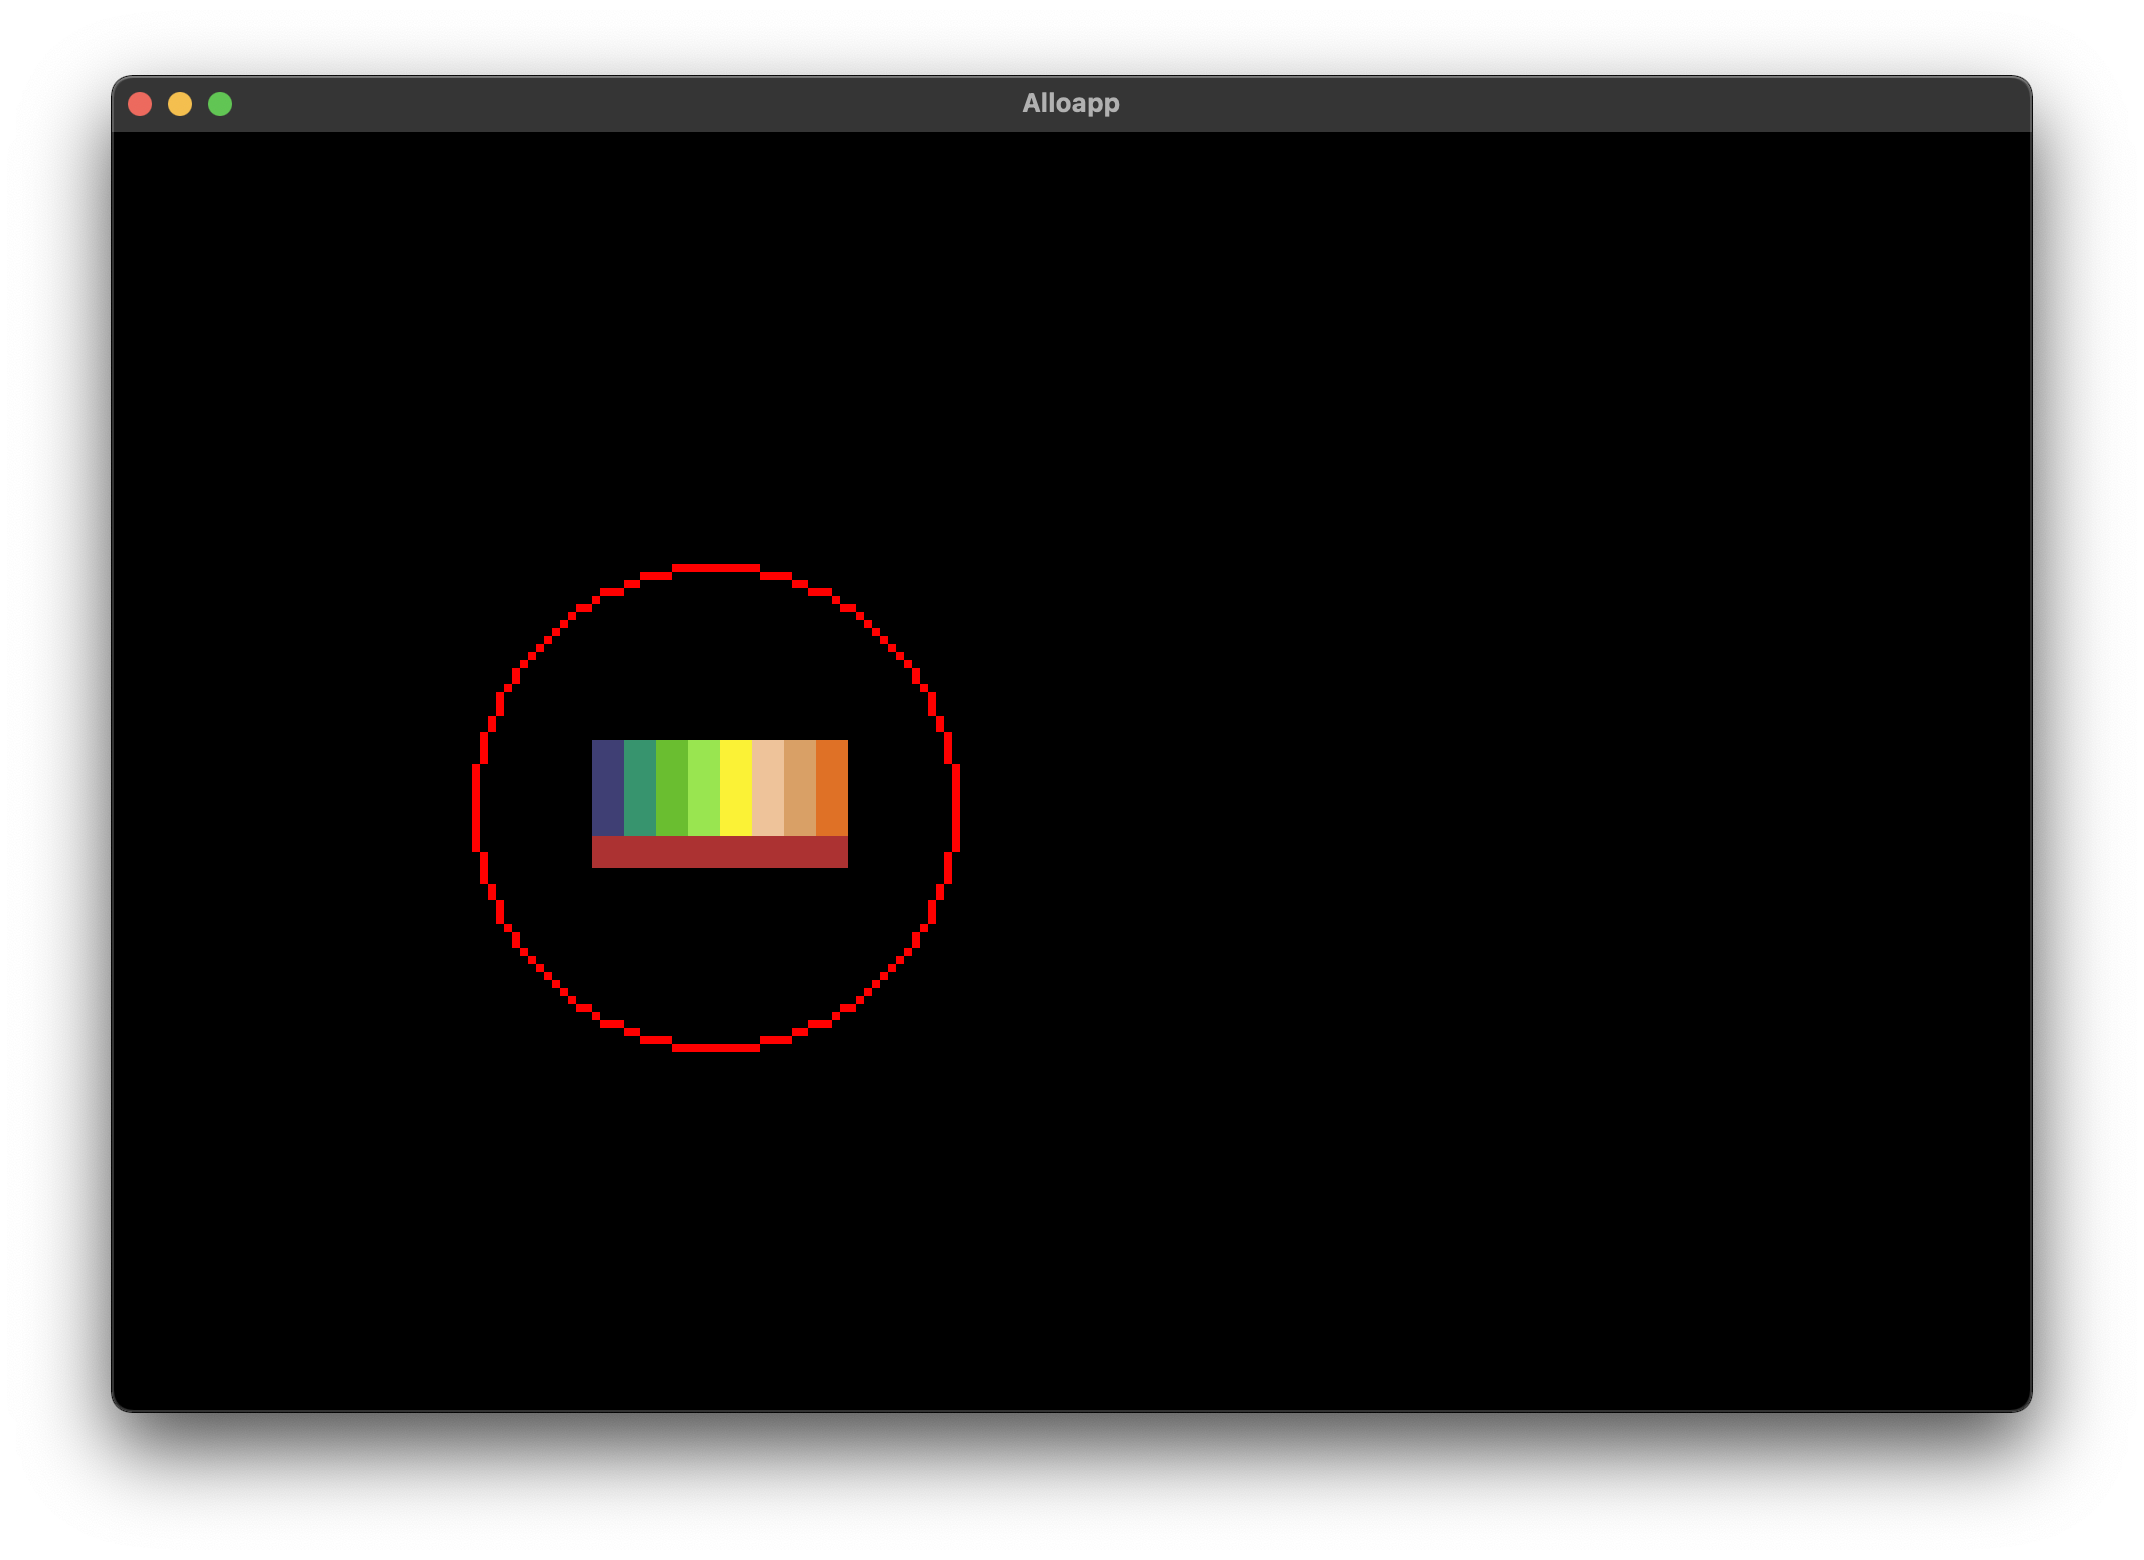
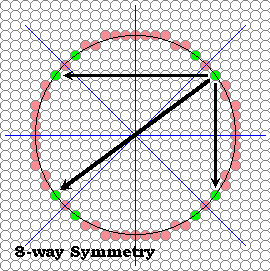
I’m using the Midpoint circle algorithm to draw circles
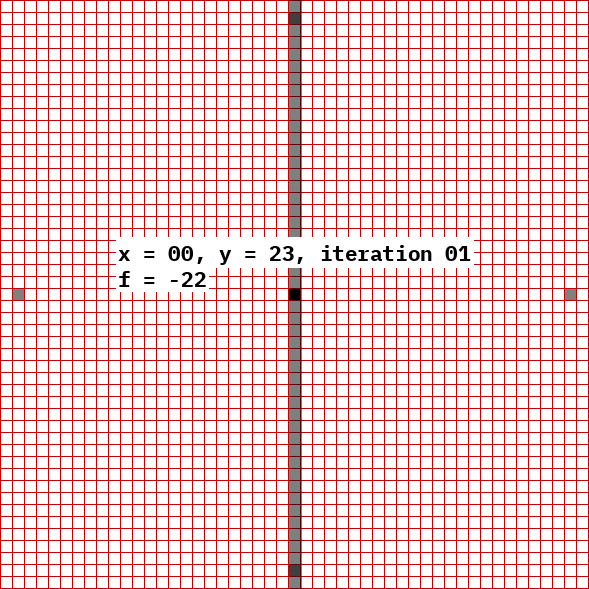
Circles are very symmetrical, so you can save a lot of time by just making 1 computation and repeating it 8 times
April 28th: Got wav visuals working
Art style & Creative direction
April 15th: Got the subtractive synthesizer working.
- For now it’s just the basic tutorial one (16 sines and 16 envelopes), but I think it’ll be pretty easy to change the architecture later.
- Also organized the sampler into classes. Side note: Allolib + Gamma is really cool and handles all the complex code so it’s actually really easy to make cool stuff.
I also got started ordering proof of concept parts, and GOD DAMN are SMD breakout boards expensive (Adafruit ones are ~$2.5 each but almost all others are >$7)
April 9th: Got the MPC3000 clone working
April something: starting point
I started working on my new synth, which is a clone of the OP-1 this time.
To start, I was heavily inspired by Prajwal Mahesh’s Portable Synth, as well as the OTTO Project
I’m going to try and make updates to this post as I go, as last time it was really annoying to go back and reupdate things.